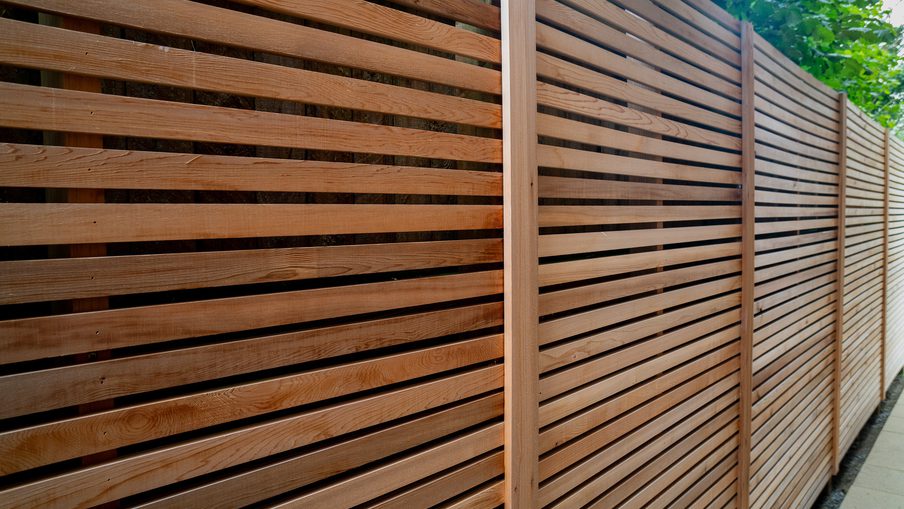
Slatted fencing is a fantastic designer alternative to solid fencing styles.
Also known as Venetian fencing, it is made from individual timber slats fixed horizontally to a post, with small consistent gaps – typically 1cm – between each slat.
This offers a contemporary, sleek and linear look. The gaps can provide a lighter, airier feel compared to traditional options like closeboard and overlap.
It’s ideal for a property boundary, or simply as decorative screening or zoning for a patio, seating area or bin storage.
Keen to bring these benefits to your garden or outdoor space? For confident DIYers, creating a slatted fence is a very manageable project. Here’s everything you need to know.
Materials and tools
- Timber fence slats in a chosen width and timber species
- For a durable, long-lasting solution, look at western red cedar, Thermo-treated wood or factory-finished slats
- Posts, specifically Use Class 4 pressure-treated timber for ground contact
- Tall enough so that at least a quarter of the post’s length is in the ground
- Rapid-setting concrete mix, like Postcrete
- Drill
- Stainless steel screws to avoid staining
- Spacers, cut to the desired gap between each slat
- String line
- Digging spade or post hole digger
- If you are removing old posts set into concrete, you may also need a concrete breaker
- Spirit level
- Tape measure or measuring wheel
- Saw, for cutting slats to length
- Pegs or spray paint, for marking out post positions
- Temporary post braces, or a helper to hold posts steady whilst concrete sets
- F-clamps for holding slats in position
How many fence slats do I need?
To find out, you firstly need these three measurements:
- Desired fence height
- Width of each slat
- Size of the gap between each slat
Then use the calculation fence height ÷ (slat width + gap size).
For example, to create a 1.8m (6ft) fence using 45mm width slats with a 10mm gap: 1800mm ÷ 55mm = 32.7. This means 33 rows of slats will be required.
With 70mm slats, 1800mm ÷ (70mm + 10mm) = 22.5, so 23 rows of slats are required.
To calculate the total linear metres of slat, multiply the number of rows by total length. 33 rows × 10m = 330 linear metres.
Always account for some damage or mistakes by ordering a few extra slats. 5-10% additional material is usually sufficient.

What gap should I leave between fence slats?
The 10mm gap is the most popular choice, striking a balance between privacy and openness.
5mm might be preferred for a more private screen, with 15-20mm at the other extreme offering a particularly open, decorative look.
Do I need planning permission for a slat fence?
It is usually possible to build or replace a fence without planning permission as long as it stays within ‘permitted development’ rights.
The maximum fence height in the UK without requiring planning permission is 2m in most places, or 1m if next to a road used by vehicles or a footpath of such a road. Listed buildings or conservation areas may have stricter rules.
Read more: Garden fence height rules & regulations in the UK
Can I build a slatted fence on sloped ground?
Yes. The key decision is whether you want to ‘step’ the slats or run them parallel to the ground. Stepping is usually easier (and looks neater) because each row of slats remains level.
How to build a slatted fence
1. Plan the fence line and plot the post positions
After using a string line to mark the fencing run, then use pegs or spray paint to mark each post position, starting with end posts and corner posts.
Divide the remaining distance into evenly-spaced bays, trying to avoid having one very small bay at the end. We would recommend a maximum post spacing of 1.8m, otherwise the slats can risk bowing.
2. Dig the post holes
Dig post holes so that at least one quarter of the post length is in the ground.
For example, for a 1.8m (6 ft) fence, a 2.4m (8ft) post is often used, so that 2ft is buried. The holes should be wide enough to allow concrete to set around all sides of the post.
3. Setting the posts
Check the posts are upright in the hole using the spirit level on two adjacent faces, and that it is aligned with the string line.
This is particularly important as slats can only look straight if the posts are too.
Ask someone else to hold the post steady (or use temporary timber braces) whilst you add the concrete mix and allow it to set.
Set the first post with special care, otherwise it can become difficult to keep the fence line straight.
Once set, fix the end post and run a string line between the two at the top and bottom, then work through the posts in between.
4. Fixing the slats
Start at the top, as this ensures the most visible part of the fence is perfectly level.
Position the first slat, check it is level, then clamp in place with an F-clamp. Consider pre-drilling the slat ends to prevent splitting.
The slat should then be fixed to the post with a stainless steel screw. Stainless steel will prevent leaching – some types of wood can react with lower-grade fixings.
With every new row, use the spacer to ensure an even gap and step back to inspect progress. Even a small difference in gap size can become obvious over a longer fence run.
Minor adjustments can be made near the bottom. Ensure there is a small clearance between the bottom slat and the ground to prevent moisture contact.
Joining the slats over longer runs
It’s likely you will need to join slats together along the length. Make sure the slats are butted together and join over a post, so both slats are supported.
Cutting slats to the correct length
Cut slats to length as you go, rather than all in advance. Don’t presume all slats will be the same length, especially on uneven ground or where the post spacing may vary slightly. Use a sharp saw and seal the end grains.
You might want to finish the fence off with a capping rail, which not only provides a finished look but helps the fence to shed water. Post caps or side trims can provide a similarly polished, finished look.

Treatments
Applying a stain before installation ensures all four sides and ends are evenly coated.
Apply the product with a natural or synthetic bristle brush using smooth strokes, following the wood’s grain and getting in all corners.
Even if you’ve chosen a naturally durable timber like cedar, larch or Thermo-ayous, applying a treatment can highlight the wood’s grain, add richness to the colour and help the wood retain these tones for longer.
Without treatment, the wood will start to weather to a silvery-grey after around six months of outdoor exposure.
You might also want to consider factory-coated fence slats, saving you a job and ensuring a professional-grade finish.
Read more: Quick guide to garden fence treatments, maintenance & care

Start your slatted fence project
Our quality planed-all-round (PAR) fence slats are available in 18 x 45mm and 18 x 70mm depending on the level of cover desired.
They are machined on-site at our Yorkshire factory from a range of premium, sustainably-sourced imported woods.
This includes western red cedar, Siberian larch, Thermo-ayous and Thermo-pine. There’s also our Colourflex range – coated Alaskan yellow cedar – which combines on-trend colours with exceptional outdoor performance.
We also offer industry-leading factory coating technologies, including UV protection, textured finishes and pre-weathered solutions.