Wood carving may be an ancient hobby, but it’s still one of the most rewarding.
It involves creating something meaningful out of a simple raw material – an outlet for self-expression that demands patience and precision. A true focus for mind and body.
Carving is hugely creative, fulfilling and relaxing, not to mention accessible. You don’t need huge amounts of space or loads of upfront investment, just commitment to gradual improvement.
So, if you’re an absolute beginner looking to pick up a carving block and knife and for the very first time, read on!
What is wood carving?
Wood carving is a woodworking technique where hand tools (such as knives, chisels and gouges) are used to shape wood to create shapes, designs and figures.
Different types of wood carving
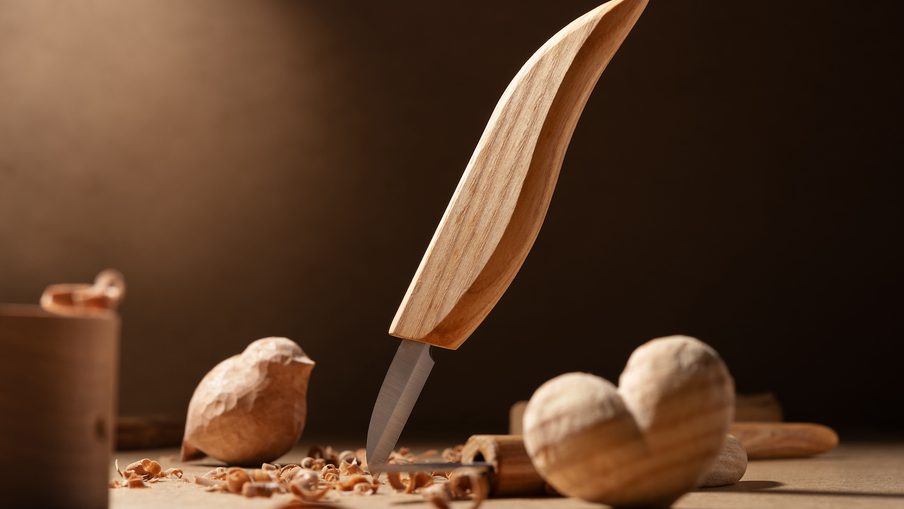
- Whittling: The most basic and fundamental type of carving, involving just a knife and some wood. You can create a 3D object (small figures, animals and decorative pieces) by cutting and shaping the wood.
- Relief carving: Creating a design on a flat wood surface – a picture ‘drawn’ into the wood using chisels, gouges and knives. You can create decorative panels or finished pieces.
- Chip carving: Removing small chips of wood with a knife or chisel. It allows you to create borders, geometric patterns or lettering. You will make a series of cuts to create triangular or pyramid-shaped chips, which are then removed.
We’d recommend that beginners start with whittling, the simplest type of wood carving. You’ll be able to make small, handmade objects like figures and animals. Since you only need a knife and some soft wood, you don’t need a huge amount of space.
Relief carving is great for those who enjoy creating images, patterns or scenery. However, you’ll need to have a proper setup to clamp down your wood, as well as a small set of chisels – this might be a type of carving you can grow into if you really enjoy whittling.

Essential tools and equipment for whittling
Knife
If you were to only get one knife as a beginner, then look for a sloyd knife – they have a medium-length (~2”) straight carbon steel blade with a narrow, pointed tip. These are most versatile, can cover the majority of carving tasks and will help you to learn basic cuts like the push, pull and stop.
The Morakniv 120 (also known as ‘Mora 120’) is a very affordable, all-purpose sloyd knife that is widely recommended for beginner whittlers and is even found in the toolset of more experienced carvers.
Other types of knives include detail knives, which have a thin, short (~1”), pointed blade – perfect for precision tasks. The Drake 1-inch detail knife, FlexCut detail knife and BeaverCraft C8 are three fine options.
Strop and polishing compound
This will ideally be used during every carving session for keeping your knife razor honed. We’d recommend something like the BeaverCraft leather paddle strop, which comes with a polishing compound, although an old leather belt can do the job too!
Carving glove and thumb guard
Made from cut-resistant material, a carving glove protects your non-dominant hand (the one holding the wood). A thumb guard protects your dominant hand (the one holding the knife).
Wood
Can’t forget that! The best choice for a beginner wood carver is undoubtedly basswood (also known as lime wood). It is soft with a fine, even grain. This results in minimal tearaway and splintering, a smoother finish and easier uptake of stains and paints.
If you can’t get your hands on any basswood, then poplar, pine and butternut are some other abundant species whose soft, fine-grained nature make them suitable. We’ve actually written an entire article about the best types of wood for carving!
All of these materials can be picked up online or from woodworking and woodturning stores.
Basic whittling cuts, techniques and tips
The four basic cuts to get started with as a beginner include:
- Push cut – the knife is held in your dominant hand, but is controlled by your non-dominant thumb and pushed away from your body through the wood. This gives a clean, precise and controlled cut. Using this technique, you can make curved shapes using a sweeping motion (also called a sweep cut).
- Rough cut – similar to a push cut, where the knife is pushed away from your body. Used for removing larger pieces of wood and general shaping in a quicker, less controlled fashion.
- Paring (or pull) cut – the knife is pulled towards you, with your non-dominant hand used to hold the wood and your dominant thumb (which is holding the knife) used to brace the wood. This cut is used for finishing and fine shaping. For safety purposes, you should use a gentle, controlled, squeezing motion.
- Stop cut – this is a small, shallow downward cut that is intended as a ‘stopper’ for another pull or push cut. It is used for creating corners or borders, such as eyes or ears.
A slightly more advanced type of cut is the V cut. This is where two angled cuts meet to form a ‘V’ shape. It can be used to define shapes, such as eyes or mouths. There’s also the pyramid (or stab) cut – it is similar to a V cut, except you create a centralised inverted pyramid using three small cuts.
When whittling, try to visualise and plan your cuts and always try to carve with the grain. Wood has a natural grain pattern direction. Going with it makes for easier, smoother cuts. Going against the grain is challenging and can result in tear away, chips and resistance.
This is why the best woods for carving have a straight, uniform grain. Woods with wild, interlocking grains can be really challenging to carve and can splinter and tear out easily.
When it comes to safety, go slowly – carving isn’t a race! Plus, if you take your time, you’ll find it to be a much more relaxing, mindful experience. Also, wear a thumb guard and a carving glove. Even the finest, most experienced whittlers pick up cuts and nicks.
Lastly, be sure to regularly strop and sharpen your knife – if you keep it razor sharp, you’ll be able to cut with more control and less force. A dull knife can be very dangerous.

Simple starter whittling projects
You’ll no doubt have seen experienced whittlers online creating incredible, detailed pieces. The aim for a beginner should just be to have fun creating different shapes and perfecting their technique with the basic cuts we mentioned earlier.
You could even take a wooden stick from outdoors and just practice your push cuts by whittling it down into a smoother shape.
When it comes to picking up some basswood, learn one project at a time and start with simple shapes and patterns that rely primarily on push cuts. Don’t worry about perfection. Simplistic is fine and not everything is going to be a masterpiece – again, just have fun.
A mushroom is a very popular newbie project. This will allow you to practice stop cuts (separating the cap from the stem) and your rounding and smoothing.
Another is a simple fish – this will hone your outlining, smoothing and ability to work with the grain. You’ll learn how to follow curves and carve symmetrical shapes.
A slightly more advanced project is to whittle simple animals, like a cat, bird or fox.
There’s so many more popular beginner projects. YouTube is every new carver’s best friend when it comes to getting inspiration and ideas for whittling – there are so many fantastic resources available.
Don’t forget the finishing touches either. You can sand lightly to remove fuzz and use some natural oil (such as tung or linseed) for added beauty.
Lastly, don’t be discouraged – you’ll almost certainly look back on your first few projects with hilarity! Just keep repeating the same projects again and again. We’d recommend whittling little and often – a 15-minute session several times per week is superior to one weekly mega marathon.

How to strop and sharpen your whittling knife
Stropping (or honing)
This should be done every session. We’d recommend using a leather paddle strop with some honing/polishing compound, such as those widely available by Beavercraft.
Apply your compound to the leather, lay the blade flat and tilt it to match the edge angle (usually around 10-20°). Pull the blade, spine first, along the leather (not cutting into the leather). Keep the pressure light and even, stropping for around 15 strokes. Flip and repeat for the other side.
The aim is to polish and align the edge, not remove metal.
Sharpening
Eventually, you may notice the knife requires more force than usual, or is crushing the wood. This likely means the knife is dull and a full sharpening will be needed. This reshapes the blade.
This is done with a sharpening stone and water or oil – lay the knife and find the bevel angle, and pull the blade along the stone while maintaining the angle.
Do full-edge strokes, from tip to base, and repeat this around 15 times for each side. You can test the sharpness on a piece of paper – if it’s catching, then use the initial stropping steps to finish.

Looking to get your hands on some wood carving supplies?
Our recently-refurbished Hobby Hall is a treasure trove of supplies for wood carving enthusiasts of all experience levels. There’s everything you’ll need to get started, including knives, gloves, strops and, of course, basswood carving blocks!
If you’re nearby, we would be delighted to see you – we’re just off the A1 near Ripon, North Yorkshire. Got some other questions?
Get in touch with our team


