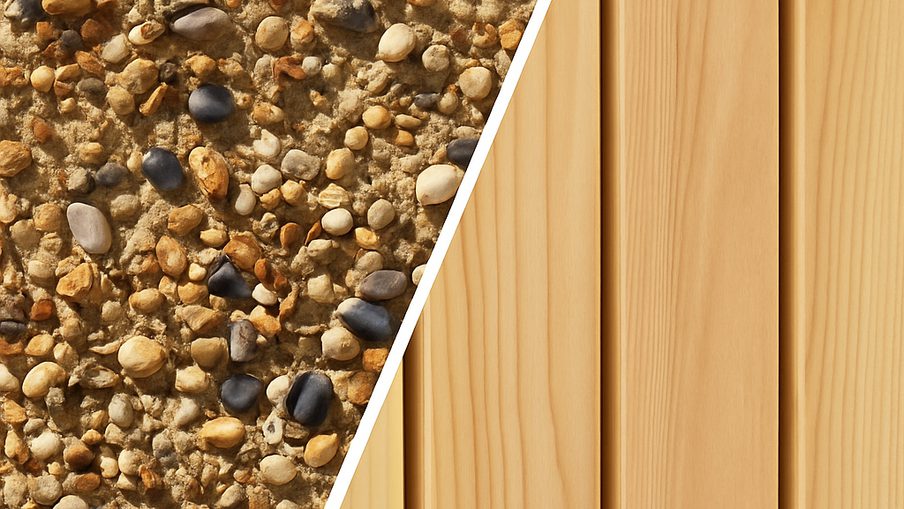
Having boomed in the early 20th century as a cost-effective facade, pebbledash (or roughcast) is no longer quite so popular. Other types of rendering, such as silicone and cement, can also look unsightly over time.
You might be considering a clean, contemporary and natural change, such as timber cladding – but can you clad over your property’s rendering? Yes, as long as the existing surface is in a good condition and soundly prepared.

Check the condition of your existing rendering
The rendering should be well bonded with no damaged, loose, crumbling, cracking, damp or hollow sections.
Pebbledash that is unstable must be removed or repaired before being clad over – it won’t hold the timber battens and cladding securely, and could move and allow water ingress later on.
Removing or repairing worn pebbledash and rendering
If your pebbledash is in a very poor condition, you should remove the rendering entirely and strip things back to the original brickwork.
This is best done by a professional team who will chip and blast the pebbledash away from the wall using specialist tools and treatments. The freshly-exposed brick may then need to be blasted and repointed.
Removing pebbledash can be a costly process – in the region of £20–£60 per m² – so whole-house removal can easily run into the thousands. However, where there are large amounts of damaged and loose render, it’s the best long-term solution.
If your rendering has only minor damage, a more cost-effective option may be to repair the cracked or flaking pebbledash to create a stable base. This can be done with exterior filler or mortar.
Prepare your surface
Whether you’re cladding over your rendering or working with the original brickwork, any dirt and algae should be removed. This ensures your membrane and battens adhere and fix correctly.
To prevent damage, avoid high-pressure washers. A stiff brush, water and mild cleaning solution will usually suffice. A fungicidal wash can be used on particularly dirty areas. Once the surface is clean, you should let it fully dry.
The installation process – membrane, battens and boards
This involves the installation of a waterproof breather membrane to keep out rain and trapped moisture. Treated timber battens are then attached to the wall with wall screws, on top of the membrane. If the cladding is to be installed horizontally, then counter-battens are also used.
These battens create a ventilated cavity which improves air flow to prevent moisture buildup (which can lead to bulging, warping and cracking over time). An insect mesh and trims should be installed at the base and openings to enhance weatherproofing.
Then, the cladding boards themselves are screwed or nailed onto the battens, usually with stainless steel fixings to prevent rust.
Unless you are a specialist yourself, we’d recommend enlisting a professional installer. Poorly-installed cladding can lead to costly moisture-related issues further down the line.


Planning a cladding project?
For inspiration, don’t miss our recent case studies or our blog on timber cladding design ideas for your house.
Whether you’re working with pebbledash or a different type of render, we’re here to help with every aspect of your project.
Explore our range of timber cladding products and drop our expert team a message for advice and assistance.
Contact us today